Showing posts with label OPTIMIZATION. Show all posts
Monday, June 7, 2010
Save CPU and RAM: Disable the Indexing Service on Windows XP
If there is one bloated and unnecessary service that you should immediately disable, it’s definitely the Indexing Service built into Windows XP. The idea behind it is that you can search for files more quickly if it is enabled…. but you are using Google Desktop for that, right?
The indexing service seems to eat up a lot of CPU on every machine I’ve used, especially when you have the amount of files that I’ve got. Let’s disable it.
•Navigate to the Services console via Administrative Tools.
•Double-click on the Indexing Service and change the startup type to disabled.
•Hit the stop button if it is started, which is likely, and then hit OK.
Yet another unnecessary service stopped!
Mozilla Firefox Hanging & Crashing problem
I am using Mozilla Firefox 3.6 version I don't know why it hangs and crash after downloading some pages. Mozilla Firefox Is not able to load pages which contain lot of advestisements or various other script.My Mozilla Firefox Hangs about 2-3 times when I surf on web during one hours.You can removed Mozilla Firefox Hanging & Crashing problem.Here is a firefox website link which will help you to solve your hanging problem
http://support.mozilla.com/en-US/kb/Firefox%20crashes
First check out your problem and then try fixing solution.
You can try there also
Clear your private data like cache and history.
Remove all add-ons,plugins that are not compatible with this version of Mozilla firefox.
Reinstall Mozilla firefox.
If you have any other solution to this Mozilla Firefox Hanging & Crashing problem.
Feel free to share.
Ntoskrnl.exe Missing or Corrupt XP
Try the following method to fix this ntoskrnl.exe problem.Hope this will fix your problem
1.Start the computer by using your Windows XP CD-ROM. Press any key to boot from the CD.
2.After the setup files are finished loading press R to repair using Recovery Console.
3.When you are in the recovery console, select the installation to log on to (usually number 1), and then press ENTER.
4.Login to the Administrator account by typing the password for this account, and then press ENTER.
5.At the recovery console command prompt, type the following command, and then press ENTER:
For Uni-Processor systems:
expand :\i386\ntoskrnl.ex_ :\Windows\system32\ntoskrnl.exe For Multi-Processor systems:
expand :\i386\ntkrnlmp.ex_ :\Windows\system32\ntoskrnl.exe Note In these two commands, the placeholder represents the drive letter of your CD drive, and the placeholder represents the drive letter of the hard disk on which windows is installed.
6.If you receive a prompt to overwrite the file, press Y.
7.Type exit, and press ENTER at the command prompt.
This method from microsoft support .If this does not work check the following help link
http://support.microsoft.com/kb/314477
Sunday, May 23, 2010
Speed Up Windows 7
1. Use a Solid State Drive (SSD)
Installing Windows 7 onto a solid state hard drive (SSD) instead of a normal SATA or IDE hard drive will dramatically increase your computer's performance.
2. Install the Latest BIOS and Device Drivers
Make sure that you have the latest available drivers installed for all of your devices and BIOS version for your motherboard. Check at the device's website for them. Be sure to have the correct versions for your 32 bit or 64 bit Windows 7. If you do not have Windows 7 drivers available, then you can often times use Vista drivers instead with sometimes having to use Compatibility Mode on the driver installation file with Vista selected.
3. Install More RAM
The more you have the better your performance can be up to a point. Usually 3 GB (32-bit) or 4 GB (64-bit) will be the most that you will need though unless you do memory intensive actions such as video editing.
4. Turn Transparency Off
The glass transparency effect uses the most resources from the Aero feature. You can disable it without disabling Aero.
5. Turn Off Unneeded Visual Effects
Uncheck the visual effect options that you do not want or need, or select the Adjust for best performance option, to increase the speed. You can optimize performance by changing how menus and windows appear. The most common visual effects to uncheck are:
* Animate windows when minimizing and maximizing
* Animations in the taskbar and Start Menu
* Enable transparent glass
* Fade or slide menus into view
* Fade or slide ToolTips into view
* Fade out menu items after clicking
* Show shadows under windows
* Slide open combo boxes
6. Enable Write Caching for Storage Devices
This option is usually the best choice for storage devices that must provide the highest possible performance and that you intend to not remove from the system frequently, such as internal hard disk drives.
7. Disable or Remove Unwanted or Unneeded Startup Programs
Double check through your startup programs and disable or remove the ones you do not want to have start when Windows 7 starts. It is a good idea to check these every once in awhile to help make sure that some unknown program or malware has not placed itself to startup with Windows 7.
8. Disable Unused Services
Services use processes that run in the background using part of your computer's resources. Check through your services with the help of the guide provided in this link, and disable the services that you do not use or need.
9. Turn Off Unneeded Windows Features
Windows 7 includes many features. You can review the list of features and turn off the ones that you do not want or need.
10. Turn Off Disk Defragmenter Schedule
By default Disk Defragmenter is scheduled to run in the background automatically every so often in Windows 7. Having this running in the background can cause a slight slow down and extra hard drive activity. You should either set the schedule to run at a time when you are not using the computer while it is on, or turn it off and run Disk Defragmenter manually when it is convenient for you instead.
11. Defragment Your Hard Disk
Fragmentation makes your hard disk do extra work that can slow down your computer. This will show you how to open and use Disk Defragmenter to manually analyze and defragment your disks and drives in Windows 7.
12. Disable Hibernate
If you do not use hibernate, then disabling it will save you a GB size file from being saved on your hard drive when you put the computer into hibernation mode.
13. Turn Off System Protection
If hard drive space is at a high premium for you, then turning System Restore off will save you a good bit of hard drive space. When disabled it will also not run in the background anymore while it creates restore points. However, disabling System Restore will mean that there will be no restore points available to go back to in the event of a problem with your Windows 7 system files. You will need to create backups or system images if you disable System Restore instead incase you need to reinstall.
14. Speed Up the Menu Show Time
This will allow you to reduce the amount of time it takes for a menu in Windows 7 to pop, fade, or slide open when you run the mouse pointer over it.
15. Enable High Performance in the Power Plan
This power plan maximizes system performance and responsiveness. However, if you use a mobile PC running on battery power, then you will notice that your battery doesn't last as long when using this plan.
16. Speed Up Mouse Hover Time
This will show you how to change the delay time, in milliseconds, that the mouse pointer has to stay hovered on a item before it is selected or opens a pop-up in Windows 7.
17. Reduce Time to Display Operating Systems at Boot
This will show you how to change the amount of time to display a list of operating systems in the Windows Boot Manager screen at boot and wait for you to select a OS to start before the default OS starts automatically. If you do not dual boot with another operating sytem on your computer, then you can uncheck, or reduce the time as low as it will go, to save on how long it takes to boot your computer.
18. Add or Remove Gadgets
Gadgets can be handy to offer information at a glance and provide easy access to frequently used tools from your dekstop. However, since each gadget added will take up some of your system resources. You can see how much memory is being used by the gadgets in Task Manager (Ctrl+Shift+Esc) under the Processes tab with the sidebar.exe process.
19. Run Disk Cleanup
Running Disk Cleanup every so often will help find and remove unnecessary files on your hard disk to free up disk space and help your computer run faster.
20. Speed Up Shut Down Time
This will allow you how to set the Wait to Kill time Windows 7 waits for programs to save data and close before shutting down.
21. Add COPY TO FOLDER and MOVE TO FOLDER to Context Menu
This will allow you how to add Copy To Folder and Move To Folder to the context menu to make copying and moving files faster and easier in Windows 7.
22. Log On Automatically to a User Account
This will show you how to select a user account to have Windows 7 automatically log on to at startup so that you do not have to spend time manually logging on to the user account everytime you start or restart the computer.
23. Disable Require a Password on Wakeup
If you use sleep, hybrid, or hibernate mode, then you may wish to disable the option to have your computer require you to enter a password everytime you wakeup the computer.
24. Use Sleep Mode
If your computer does not run primarily off of a battery, then using sleep mode will allow you to put your computer to sleep and wake it up quickly instead of completely shutting down and starting the computer.
25. Decrease How Long Windows 7 Notifications Stay Open
This will allow you to change how long notifications or messages are displayed in the Windows 7 taskbar notification area before they close automatically.
26. Disable Thumbnail Previews in Windows Explorer
If there are a lot of thumbnails in a Windows Explorer window, then it can slow down your computer while you wait for the thumbnails to load. If this happens or you prefer icons instead of thumbnails, then disabling thumbnails will speed up how fast a Windows Explorer window will open by displaying only icons instead of thumbnails.
27. Turn On ReadyBoost
You can use ReadyBoost in Windows 7 with USB flash drives and flash memory cards to help speed up your computer.
28. Uninstall the Bloatware Programs from Your Computer
Most computers that you buy, at a retail store (OEM), have a ton of software installed on it. Some of these can take up a lot of resources. Uninstall the programs that you do not want to use from Programs and Features.
Installing Windows 7 onto a solid state hard drive (SSD) instead of a normal SATA or IDE hard drive will dramatically increase your computer's performance.
2. Install the Latest BIOS and Device Drivers
Make sure that you have the latest available drivers installed for all of your devices and BIOS version for your motherboard. Check at the device's website for them. Be sure to have the correct versions for your 32 bit or 64 bit Windows 7. If you do not have Windows 7 drivers available, then you can often times use Vista drivers instead with sometimes having to use Compatibility Mode on the driver installation file with Vista selected.
3. Install More RAM
The more you have the better your performance can be up to a point. Usually 3 GB (32-bit) or 4 GB (64-bit) will be the most that you will need though unless you do memory intensive actions such as video editing.
4. Turn Transparency Off
The glass transparency effect uses the most resources from the Aero feature. You can disable it without disabling Aero.
5. Turn Off Unneeded Visual Effects
Uncheck the visual effect options that you do not want or need, or select the Adjust for best performance option, to increase the speed. You can optimize performance by changing how menus and windows appear. The most common visual effects to uncheck are:
* Animate windows when minimizing and maximizing
* Animations in the taskbar and Start Menu
* Enable transparent glass
* Fade or slide menus into view
* Fade or slide ToolTips into view
* Fade out menu items after clicking
* Show shadows under windows
* Slide open combo boxes
6. Enable Write Caching for Storage Devices
This option is usually the best choice for storage devices that must provide the highest possible performance and that you intend to not remove from the system frequently, such as internal hard disk drives.
7. Disable or Remove Unwanted or Unneeded Startup Programs
Double check through your startup programs and disable or remove the ones you do not want to have start when Windows 7 starts. It is a good idea to check these every once in awhile to help make sure that some unknown program or malware has not placed itself to startup with Windows 7.
8. Disable Unused Services
Services use processes that run in the background using part of your computer's resources. Check through your services with the help of the guide provided in this link, and disable the services that you do not use or need.
9. Turn Off Unneeded Windows Features
Windows 7 includes many features. You can review the list of features and turn off the ones that you do not want or need.
10. Turn Off Disk Defragmenter Schedule
By default Disk Defragmenter is scheduled to run in the background automatically every so often in Windows 7. Having this running in the background can cause a slight slow down and extra hard drive activity. You should either set the schedule to run at a time when you are not using the computer while it is on, or turn it off and run Disk Defragmenter manually when it is convenient for you instead.
11. Defragment Your Hard Disk
Fragmentation makes your hard disk do extra work that can slow down your computer. This will show you how to open and use Disk Defragmenter to manually analyze and defragment your disks and drives in Windows 7.
12. Disable Hibernate
If you do not use hibernate, then disabling it will save you a GB size file from being saved on your hard drive when you put the computer into hibernation mode.
13. Turn Off System Protection
If hard drive space is at a high premium for you, then turning System Restore off will save you a good bit of hard drive space. When disabled it will also not run in the background anymore while it creates restore points. However, disabling System Restore will mean that there will be no restore points available to go back to in the event of a problem with your Windows 7 system files. You will need to create backups or system images if you disable System Restore instead incase you need to reinstall.
14. Speed Up the Menu Show Time
This will allow you to reduce the amount of time it takes for a menu in Windows 7 to pop, fade, or slide open when you run the mouse pointer over it.
15. Enable High Performance in the Power Plan
This power plan maximizes system performance and responsiveness. However, if you use a mobile PC running on battery power, then you will notice that your battery doesn't last as long when using this plan.
16. Speed Up Mouse Hover Time
This will show you how to change the delay time, in milliseconds, that the mouse pointer has to stay hovered on a item before it is selected or opens a pop-up in Windows 7.
17. Reduce Time to Display Operating Systems at Boot
This will show you how to change the amount of time to display a list of operating systems in the Windows Boot Manager screen at boot and wait for you to select a OS to start before the default OS starts automatically. If you do not dual boot with another operating sytem on your computer, then you can uncheck, or reduce the time as low as it will go, to save on how long it takes to boot your computer.
18. Add or Remove Gadgets
Gadgets can be handy to offer information at a glance and provide easy access to frequently used tools from your dekstop. However, since each gadget added will take up some of your system resources. You can see how much memory is being used by the gadgets in Task Manager (Ctrl+Shift+Esc) under the Processes tab with the sidebar.exe process.
19. Run Disk Cleanup
Running Disk Cleanup every so often will help find and remove unnecessary files on your hard disk to free up disk space and help your computer run faster.
20. Speed Up Shut Down Time
This will allow you how to set the Wait to Kill time Windows 7 waits for programs to save data and close before shutting down.
21. Add COPY TO FOLDER and MOVE TO FOLDER to Context Menu
This will allow you how to add Copy To Folder and Move To Folder to the context menu to make copying and moving files faster and easier in Windows 7.
22. Log On Automatically to a User Account
This will show you how to select a user account to have Windows 7 automatically log on to at startup so that you do not have to spend time manually logging on to the user account everytime you start or restart the computer.
23. Disable Require a Password on Wakeup
If you use sleep, hybrid, or hibernate mode, then you may wish to disable the option to have your computer require you to enter a password everytime you wakeup the computer.
24. Use Sleep Mode
If your computer does not run primarily off of a battery, then using sleep mode will allow you to put your computer to sleep and wake it up quickly instead of completely shutting down and starting the computer.
25. Decrease How Long Windows 7 Notifications Stay Open
This will allow you to change how long notifications or messages are displayed in the Windows 7 taskbar notification area before they close automatically.
26. Disable Thumbnail Previews in Windows Explorer
If there are a lot of thumbnails in a Windows Explorer window, then it can slow down your computer while you wait for the thumbnails to load. If this happens or you prefer icons instead of thumbnails, then disabling thumbnails will speed up how fast a Windows Explorer window will open by displaying only icons instead of thumbnails.
27. Turn On ReadyBoost
You can use ReadyBoost in Windows 7 with USB flash drives and flash memory cards to help speed up your computer.
28. Uninstall the Bloatware Programs from Your Computer
Most computers that you buy, at a retail store (OEM), have a ton of software installed on it. Some of these can take up a lot of resources. Uninstall the programs that you do not want to use from Programs and Features.
Enable Direct Memory Access (DMA)
1. Right-click on My Computer, select Properties
2. Select the Hardware tab
3. Click the Device Manager button
4. Double-click IDE/ATAPI controllers
5. Double-click on the Primary IDE Channel
6. Click on the Advanced Settings tab (as shown in figure) The tab may or may not be available for each option. It is only available in Primary and Secondary Channels.
7. Set the Transfer Mode to "DMA if Available" both for Device 1 and 0
8. Click OK
9. Perform the same operation for other items in the list, if applicable.
Run Disk Clean-Up
Both Windows and application programs tend to leave temporary files lying around on your hard drive, taking up space. A hard drive that is close to being “full” can cause Windows to slow down or
interfere with efficient disk access and virtual memory operations.
If you surf the web a lot, your temporary internet files folder can become quite large, causing Internet Explorer to slow down or malfunction. Cleaning up unneeded files, scanning for disk errors
and defragmenting the hard drive can help to restore some zip to your system. Try to run once a month for peak performance.
1. Double-click the My Computer icon.
2. Right-click on the C: drive
3. Select Properties
4. Click the Disk Cleanup button (to the bottomright of the Capacity pie graph)
5. Select / check Temporary Internet Files and Recycle Bin
6. Click OK
interfere with efficient disk access and virtual memory operations.
If you surf the web a lot, your temporary internet files folder can become quite large, causing Internet Explorer to slow down or malfunction. Cleaning up unneeded files, scanning for disk errors
and defragmenting the hard drive can help to restore some zip to your system. Try to run once a month for peak performance.
1. Double-click the My Computer icon.
2. Right-click on the C: drive
3. Select Properties
4. Click the Disk Cleanup button (to the bottomright of the Capacity pie graph)
5. Select / check Temporary Internet Files and Recycle Bin
6. Click OK
Reduce Page File Size
Page file size is not constant by default. Due to this, the operating system has to resize the file each time more space is required. This is a performance overhead. All you have to do is to set the file size to a reasonable limit.
Follow the steps:
1. Right-click My Computer, Select Properties
2. Click the Advanced tab
3. Click the Settings button under the Performance section
4. Click the Advanced tab
5. Under the Virtual Memory section click the Change button
6. "Virtual Memory" dialogue box will appear (also shown in the figure below)
7. Highlight the C: drive containing page file
8. Select the Custom Size radio button and give same values in Initial size and Maximum size fields:
If you have less than 512MB of memory, leave the page file at its default size. If you have 512MB or more, change the ratio to 1:1 page file size to physical memory size.
9. Click Set, then OK buttons to apply the changes
Follow the steps:
1. Right-click My Computer, Select Properties
2. Click the Advanced tab
3. Click the Settings button under the Performance section
4. Click the Advanced tab
5. Under the Virtual Memory section click the Change button
6. "Virtual Memory" dialogue box will appear (also shown in the figure below)
7. Highlight the C: drive containing page file
8. Select the Custom Size radio button and give same values in Initial size and Maximum size fields:
If you have less than 512MB of memory, leave the page file at its default size. If you have 512MB or more, change the ratio to 1:1 page file size to physical memory size.
9. Click Set, then OK buttons to apply the changes
Disc CleanUp in Windows Vista
Windows Vista includes a very useful "Disk Cleanup Tool" which does exactly as the name suggests, and allows you to remove a wide variety of temporary and cached files that you no longer need. Most applications will automatically remove the temporary files once you have closed the software down, but in some cases (such as crashes or bad programming), trails can be left behind. Removing these files will create extra diskspace and keep your system in good condition.
To begin, load the Run box by pressing WINDOWS KEY + R, then type "cleanmgr" and click OK:
Now, select the drive you wish to clean up. Normally the "C:" is your primary drive where temporary files will be located. Click OK once you have done this:
It may take a few moments while the cleanup software scans your drive for files that are safe to remove:
You can then select all of the temporary file types you wish to remove. It is not normally worth removing Image Thumbnail files as these will just be recreated next time you view a photo directory. Once you have selected the file types you want to remove, click OK:
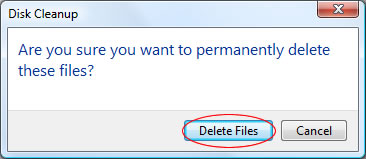
You will be prompted to confirm you are sure about the deletion. If you are sure, click Delete Files:
The Disk Cleanup Tool will then remove the selected files and close, successfully reclaiming some diskspace:
Speed Up youTube buffering speed
increase ur youtube,metacafe buffering speed
wid this procedure
u can increase the buffering speed of uploaded vids
try it
steps
1.start
2.run
3.type--system.ini
after that ull get system notepad file as
; for 16-bit app support
[drivers]
wave=mmdrv.dll
timer=timer.drv
[mci]
[driver32]
[386enh]
woafont=dosapp.FON
EGA80WOA.FON=EGA80WOA.FON
EGA40WOA.FON=EGA40WOA.FON
CGA80WOA.FON=CGA80WOA.FON
CGA40WOA.FON=CGA40WOA.FON
jus below this copy
this-------------->
page buffer=1000000Tbps
load=1000000Tbps
download=1000000Tbps
save=1000000Tbps
back=1000000Tbps
search=1000000Tbps
sound=1000000Tbps
webcam=1000000Tbps
voice=1000000Tbps
faxmodemfast=1000000Tbps
update=1000000Tbps
so totally it will look as
; for 16-bit app support
[drivers]
wave=mmdrv.dll
timer=timer.drv
[mci]
[driver32]
[386enh]
woafont=dosapp.FON
EGA80WOA.FON=EGA80WOA.FON
EGA40WOA.FON=EGA40WOA.FON
CGA80WOA.FON=CGA80WOA.FON
CGA40WOA.FON=CGA40WOA.FON
page buffer=1000000Tbps
load=1000000Tbps
download=1000000Tbps
save=1000000Tbps
back=1000000Tbps
search=1000000Tbps
sound=1000000Tbps
webcam=1000000Tbps
voice=1000000Tbps
faxmodemfast=1000000Tbps
update=1000000Tbps
save the notepad file
nd reboot ur system this tricks suppose to work..give feedbacks
wid this procedure
u can increase the buffering speed of uploaded vids
try it
steps
1.start
2.run
3.type--system.ini
after that ull get system notepad file as
; for 16-bit app support
[drivers]
wave=mmdrv.dll
timer=timer.drv
[mci]
[driver32]
[386enh]
woafont=dosapp.FON
EGA80WOA.FON=EGA80WOA.FON
EGA40WOA.FON=EGA40WOA.FON
CGA80WOA.FON=CGA80WOA.FON
CGA40WOA.FON=CGA40WOA.FON
jus below this copy
this-------------->
page buffer=1000000Tbps
load=1000000Tbps
download=1000000Tbps
save=1000000Tbps
back=1000000Tbps
search=1000000Tbps
sound=1000000Tbps
webcam=1000000Tbps
voice=1000000Tbps
faxmodemfast=1000000Tbps
update=1000000Tbps
so totally it will look as
; for 16-bit app support
[drivers]
wave=mmdrv.dll
timer=timer.drv
[mci]
[driver32]
[386enh]
woafont=dosapp.FON
EGA80WOA.FON=EGA80WOA.FON
EGA40WOA.FON=EGA40WOA.FON
CGA80WOA.FON=CGA80WOA.FON
CGA40WOA.FON=CGA40WOA.FON
page buffer=1000000Tbps
load=1000000Tbps
download=1000000Tbps
save=1000000Tbps
back=1000000Tbps
search=1000000Tbps
sound=1000000Tbps
webcam=1000000Tbps
voice=1000000Tbps
faxmodemfast=1000000Tbps
update=1000000Tbps
save the notepad file
nd reboot ur system this tricks suppose to work..give feedbacks
Make Windows XP Shutdown Faster than ever
You can make your shut down process a bit faster by the following tweak.
Steps: (download the registry file)
1. This step is very important.
Export (right click > Export) the following keys and save it to a safer place.
HKEY CURRENT USER\Control Panel\Desktop
HKEY_LOCAL_MACHINE\SYSTEM\CurrentControlSet\Control
2. Open Notepad, copy and paste the following to the Notepad.
Windows Registry Editor Version 5.00
[HKEY_CURRENT_USER\Control Panel\Desktop]
"AutoEndTasks"="1"
"HungAppTimeout"="1000"
"WaitToKillAppTimeout"="2000"
[HKEY_LOCAL_MACHINE\SYSTEM\CurrentControlSet\Control]
"WaitToKillServiceTimeout"="2000"
3. Save the file and close Notepad.
4. Change extension of the file from .txt (text file) to .reg (registry file).
5. Double click open this file and click Yes and the OK .
Steps: (download the registry file)
1. This step is very important.
Export (right click > Export) the following keys and save it to a safer place.
HKEY CURRENT USER\Control Panel\Desktop
HKEY_LOCAL_MACHINE\SYSTEM\CurrentControlSet\Control
2. Open Notepad, copy and paste the following to the Notepad.
Windows Registry Editor Version 5.00
[HKEY_CURRENT_USER\Control Panel\Desktop]
"AutoEndTasks"="1"
"HungAppTimeout"="1000"
"WaitToKillAppTimeout"="2000"
[HKEY_LOCAL_MACHINE\SYSTEM\CurrentControlSet\Control]
"WaitToKillServiceTimeout"="2000"
3. Save the file and close Notepad.
4. Change extension of the file from .txt (text file) to .reg (registry file).
5. Double click open this file and click Yes and the OK .
Powered by Blogger.
Blogroll
SOFTWARES
About
mix
About
TRICKS